Tuesday, July 31, 2012

Evolution of a living room

One of a pair of mid century Duncan Phyfe style tables

When I bought this house I was sure that I would paint my living room a deep, slightly orange red, just like my last house. I thought I would reuse every bit of furniture in the same way too.
The way it came together surprised me and I only have one thing left to do.


I kept the Duncan Phyfe tables and this wonderful settee. I found that the light was vastly different and my stodgy style was evolving and classics could include modern pieces.
I played with different ideas in my head and settled on Sherwin-Williams Faint Coral, a barely there pink, as the wall color. This color doesn't like having its picture taken. Most of my living room photos look like the walls are beige.
I played with different art work and furniture arrangements, but the layout is tough. There is a very large opening to the entry way and a large set of arches perpendicular to that leading into the dining room.
Here are the things that led to my living room as it is today.


While I was in Culpeper, Va  at Georgie Mae's buying those terrific chairs for my dining room I found something that really took the room in the feminine direction that I was aiming for and it was a huge departure from things I normally like and it surprised even me.


I absolutely had to switch out the lighting. 
There was one of those brushed nickel "boobs" in the living room. I replaced it with  this antique chandelier...


 that I got on eBay for just $250. Those are big box store prices !
Next I bought these chairs,


here you see them reupholstered and repaired after a 5 month battle with the shipping company, which doubled their cost ! :(

Harummpf!

Next, I bought more chairs...
at a price that would have me in divorce court if my husband knew.
 Don't judge, it was my own money.
All the while my windows had stupid mini blinds.
I worked in a drapery workroom for awhile and know how to make drapes myself but I just don't have the time or proper setup to "board" the drapes and make them properly, especially with a toddler about.
I bought ready mades and some trim. Read about it HERE.

I wanted Lucite rods but settled for an enormously more cost effective choice.


I snagged the brass-look rods and Lucite finials at Bed, Bath and Beyond for a reasonable price.
Around the same time, I ran into my local Salvation Army and fond this Korean chest for $15.


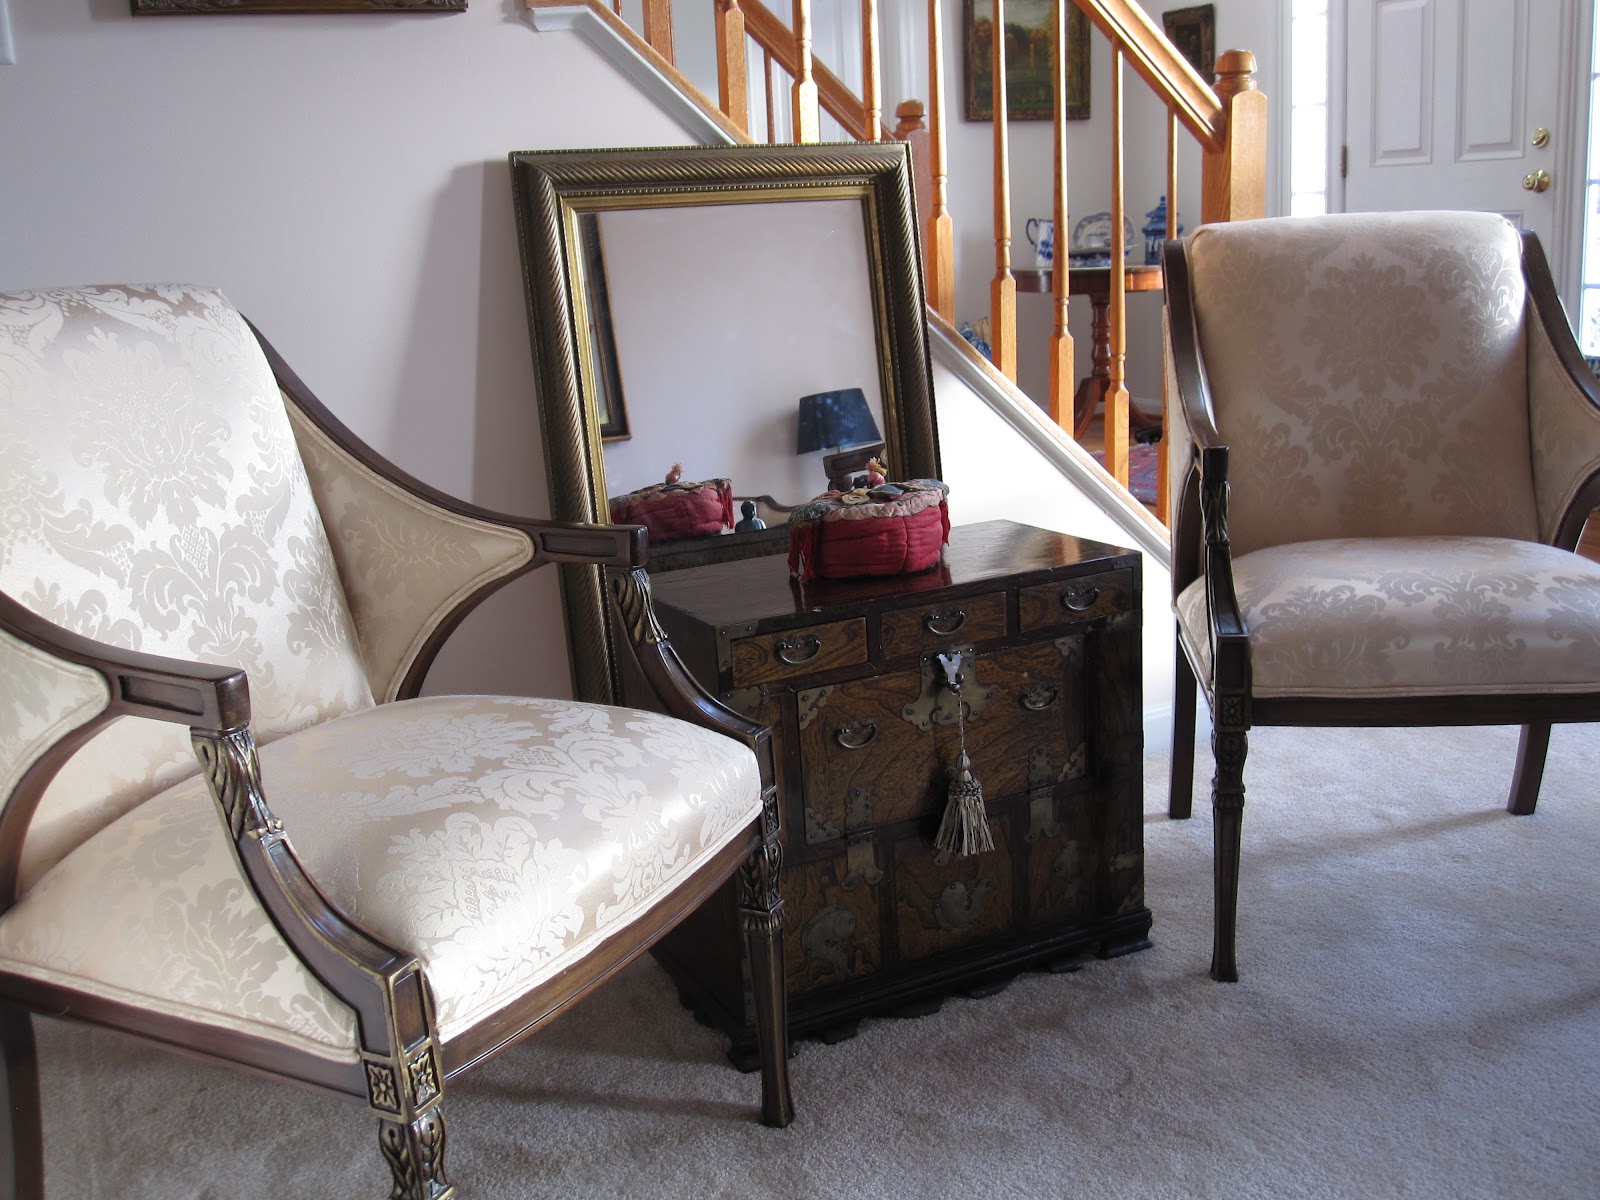
It serves as a table between the chairs that I, now love to sit in. They are so comfy.
The mirror got propped there and actually works. It reflects the back of the Korean chest that is covered with writing.

Let's talk about the art work.


Above the Bombe chest I have this abstract.


It is one of the few pieces of art that I have not tired of. 

Over the sofa I had this piece by Jenny of MFAMB fame.


I like it but it wasn't doing it for me in the room as a result Helen's room is shaping up nicely for a 3 year-old.
I ended up with a painting that my husband loves and one that came from being in an enormously happy place.
He calls it "ED" The title is "Hatching a charmed life"
It is oddly very difficult to photograph.


Next is an antique, French impressionist painting that I bought for less than $30 on eBay.


I really love it. The frame is new.


I have all sorts of accessories that mean something to me.

 
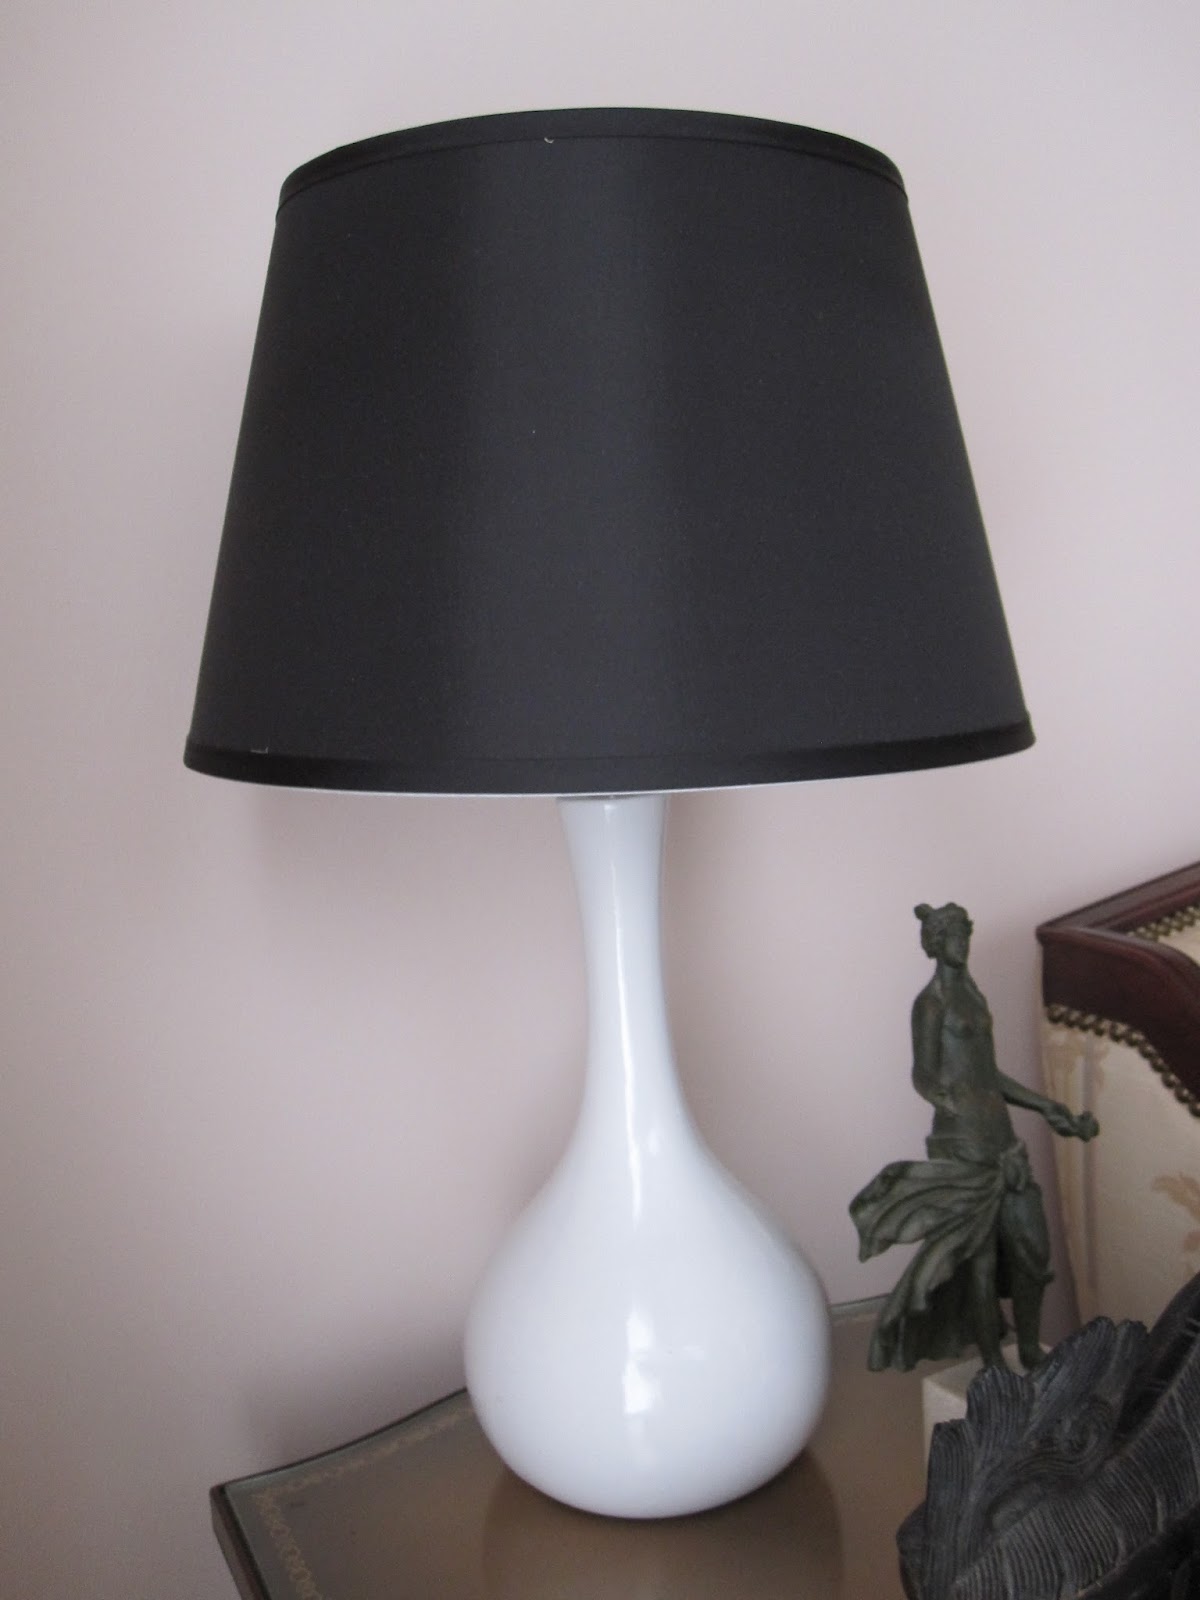
The room is full of high and low but almost everything was a bargain like these $15 lamps from Walmart.
Coffee table must go

I totally love the black velvet bolsters I had made

This is pretty much the way it is now.
I know the rug is too small but I love it. The colors are perfect and it was my grandmother's.
The one thing that I hate is the coffee table.
Six years ago I was looking for the Duncan Phyfe style end tables and found an eBay seller locally that had some but they came with the coffee table. I had not even thought about the coffee table situation for my, then new, house so I took it figuring I'd deal with it later.
Well guys, its later and I can't make up my mind on anything.
 There are too many tables that I love.
One of these days I hope to do a gleeful post on my new gorgeous coffee table.

I am happy with the room so far.
What do you think?

Sunday, July 29, 2012

Beefy!

I recently started work on a commission for a 48" x 60" painting. That's five feet folks!  I have got only one inch on this canvas so it feels enormous to me.
I started this way...


Propping it against the wall on wooden blocks. Not ideal. My husband, usually the voice of reason and restraint, said, "You should go buy on of those huge beefy easels."
me: They are like $200.
husband: You would use it.
The door slammed as I ran out at 8:00 to get to the store before it closed.
 The bummer was that the two art stores still opened on had small easels so I had to wait until Saturday.


I got the biggest most expensive one they had. There actually are much bigger more expensive ones out there in the world but this was fine for me. It holds up to an 84 inch canvas!
The assembly needed was another story.

Too many of some bits and not enough of others. At least I think. The directions were cryptic and we needed a microscope to read them.
We've all been there, right?


I needed to wait for my husband's help. It took both of us to finish this but I am thrilled with it.


Notice how I have plastic to protect the easel but not my craptastic floor!

Friday, July 27, 2012

canvas, forms, and frames...oh my!


I have been busy preparing for two exhibition deadlines. One is today and I can't tell you how unnerving that is to me. I don't usually get in barely under the wire.
It involves filling out forms, making CDs, wiring canvases, and in this case making frames.
I also am working on a commission for a large, 48 x 60 to be exact, painting. I had to order stretcher bars and canvas and put together my own canvas.
Here is a little tutorial, in case you ever have the inclination to make your own.

tongue and groove stretcher bars

Some bars are tongue and groove and others are just cut at a 45 degree angle.
If they are tongue and groove, a hammer is necessary to put them together.

 
Either type needs special care to be sure that they are square when to join them.


You want to be sure the lip that is only on one side is upon all of the pieces. This lip keeps the canvas off of the wood.
I use an electric staple gun with 1/4" or 3/8" staples. On small or medium canvases I use 3 staples on each side of each joint. more on large ones.

Continue confirming that each corner is square as you go.


Next you want to cut your canvas at least 3 inches larger on each side than your frame.
I get mine from Fabric.com for $7 a yard, use a coupon code and order enough to get free shipping.


If you have ever recovered a simple seat, you will be at home with this step. You put two or three staples in the center of one side and then pull the canvas tight on the opposite side and insert two or three more staples. Next, you do the same on the other sides being sure to pull the canvas tight.

Once the centers are done I continue further down each side staying about four inches away from each corner.

The corners are a bit more tricky to explain. You need to pull the corner up tightly and pleat the fabric at an angle on either side and cut off the resulting point.


Next, fold down one of the pleats, making a right angle as shown above.


Fold the other pleat over neatly, with no over hang as that would interfere with framing later. Once this is done your canvas may seem a bit floppy. Applying gesso will will help tighten and firm up the canvas for painting.

starting to gesso a canvas
Speaking of gesso, I have to get my enormous canvas out to my very hot garage to gesso today.

Wednesday, July 25, 2012

Collage fun

I had fun with Pic Monkey creating this board around my newest painting, "Imperata"

"Imperata" 30 x 40 acrylic on canvas by Kerry Steele HERE
I am horrible about sourcing links. Most of the images on this board can be found on my Pinterest board "Pink"

The painting is named for this ornamental grass.


It is known by several names including Japanese blood grass but that would not have been a good title so I went with the Latin botanical name.

Have you made any fun collage boards lately?
If so, feel free to link to them in the comments section.
Happy Wednesday!

Tuesday, July 24, 2012

Keeping it real

This is only my kitchen in my dreams
I am about to be very stupid  brave and make it difficult for you to say something kind.
I am going to show you my kitchen and ask you for suggestions. HA!


It is like getting into a freezing cold pool, I have to ease into the ugly. 
That right there is the window above the sink. I have the fabric and lining cut in a linen toile for a valance where the silly hardware is now. Its been cut for at least six months. Tisk, tisk, I know.

I don't dare show you the faucet. Lets just say it is decidedly "low rent" looking.


Yes, folks I have black appliances. sniffle
I have dark cabinets, laminate counter tops, and no bulkhead or crown molding. Just boxes on the wall.


The oven/microwave is a mile from the cooktop and that annoys me.
At the very bottom of this photo you can see the edge of the thing I hate most... the peninsula with a bar height thingy. Yuck!
I suppose it would be easier to visualize with a floor plan.

My lazy drawing

 Between the wall oven and the end of the peninsula is a pinch point. It drives me crazy.


Behind that "bar thingy" is clutter central. I did not take a picture.


This last photo brings me to my question for you. I need ideas.
These antique, French canisters are the only thing I have on top of my cabinets. They are there simply because it was the only place to display them. I do not like ladders and I don't want to have to dust a bunch of stuff up there.
I am not redoing my kitchen anytime soon unless you buy a lot of paintings (hint) but I really want to make it look better. 
Ideas?
One thing, please do not say paint the cabinets. My husband painted the cabinets in our last house to sell it and used an entire week's vacation to do it. He will leave me for sure if I so much as mention it.
I am also not likely to put things on the counters. This is a hard working kitchen. My husband is a butcher, formerly a fishmonger. Food is important. 
But so are looks.
 I just want a little zhush.
So lay it on me. I am stumped.

Sunday, July 22, 2012

When life hands you peppers...

We have eaten this many and have about 100 more ready to pick

No, you don't make pepperade! You DO have to start cooking.

Its harvest time at my house and even though I love vegetables that we have grown, I find it a bit overwhelming at times. This is our first vegetable garden at this house.
We look forward to stuffing these peppers with sweet Italian sausage and roasting them with olive oil and sliced onions every year. This garden seemingly produces watery peppers so that wasn't the killer treat we hoped. Its OK because a rough chop of peppers and onions roasted in olive oil served with a crusty baguette is easier.
On Saturday, I took out my behemoth food mill and processed tomatoes for sauce. I set aside some for my Tomato-basil granita ( think savory sorbet) and cooked the rest down to a paltry amount of sauce. I didn't know there were so many more ready to be picked so I get to do it all over again in the next day or two.
Today I made  a standard that I read about in Vogue back in the '80s. I had no way to write it down and noticed that the amounts in the recipe were 1-2-3.

This curried carrot soup was in an article about spa food. Remember when that was all the rage?
Anyway, I don't have the nutritional info but I ran the recipe through a calculator and there are less than 4 grams of fat, 55 calories per serving and a bagillion vitamins and minerals.

3 carrots peeled, rough chopped
2 ribs cellery rough chopped
1 medium onion rough chopped
3 cups chicken or vegetable broth
2 Tablespoons of curry powder (less if you can't take the heat)
1 Tablespoon oil

Add the carrot, celery and onion to a saucepan with the oil and "sweat" the vegetables, stirring occasionally for 10 minutes. Add the curry powder  and stir over medium heat for one minute. Add the broth and simmer for 30 minutes or until the vegetables are tender. Let cool and puree.

It is fabulous cold too.
I'll be back with design stuff once I get this mess cleaned up! *sigh*

Wednesday, July 18, 2012

Love note

"Love note" 32 x 36 acrylic on canvas by Kerry Steele

Busy figuring out details of a commission today but I thought I would share this new painting, "Love note". I chose the title because I often stay up into the wee hours to paint uninterrupted and my husband often rises at 3 or 4 am for work. Sometimes we leave each other little love notes on the coffee maker and I painted a tiny love note while I was working on this.
I know... we are goofy. Try not to throw up!

Tuesday, July 17, 2012

Got 20 minutes ?

I saw this inspiring and dead charming commencement speech by Neil Gaiman on Mimi&Meg a while back and I almost did not bother to watch it.
 I am so glad I did. It has really stuck with me and come up in conversation many times. I thought I would share it with you. If you are at all creative it will hit home.

Inspiration:photos to canvas

Luberón by Kerry Steele
This painting has been around for a month or so but I just listed it on Etsy with these inspiration photos.


Mine is an abstraction to the largest degree. I can't explain how I get from the inspiration photo to my abstract vision. I suppose I take the colors and shapes and shake gently.
Here are a few more.

These flowers are inspiration...


for this.
Arrangement in cut glass 24 x 30 acrylic on canvas by Kerry Steele
I have to say that my camera might be my undoing. I just can't seem to get clear color. Or maybe its my computer.


This photo of Senanque, in France became...

"Senanque" acrylic on canvas by Kerry Steele

 This garden's colors were the inspiration for my painting "Boxwood garden".

"Boxwood garden" acrylic on canvas by Kerry Steele

Also....sigh.. I am using this inspiration photo for a large painting but I am not liking it so far.


I am not complaining. This still never seems like work. I love to paint.
 I should share that I used to be of the thought that art, real art, should come from a deep angst or negative emotion.
I painted "there" before but have found far more success and admiration for my work in this happy place that is now.

You can check out more of my inspiration on my Pinterest board "Painting Inspiration"